How to Mix a Song From Stems: From Export to a Master-Ready Mix
How to export stems that mix well, what a finished mix actually does, how to judge it honestly at matched loudness, and how to hand a clean, master-ready file to mastering.
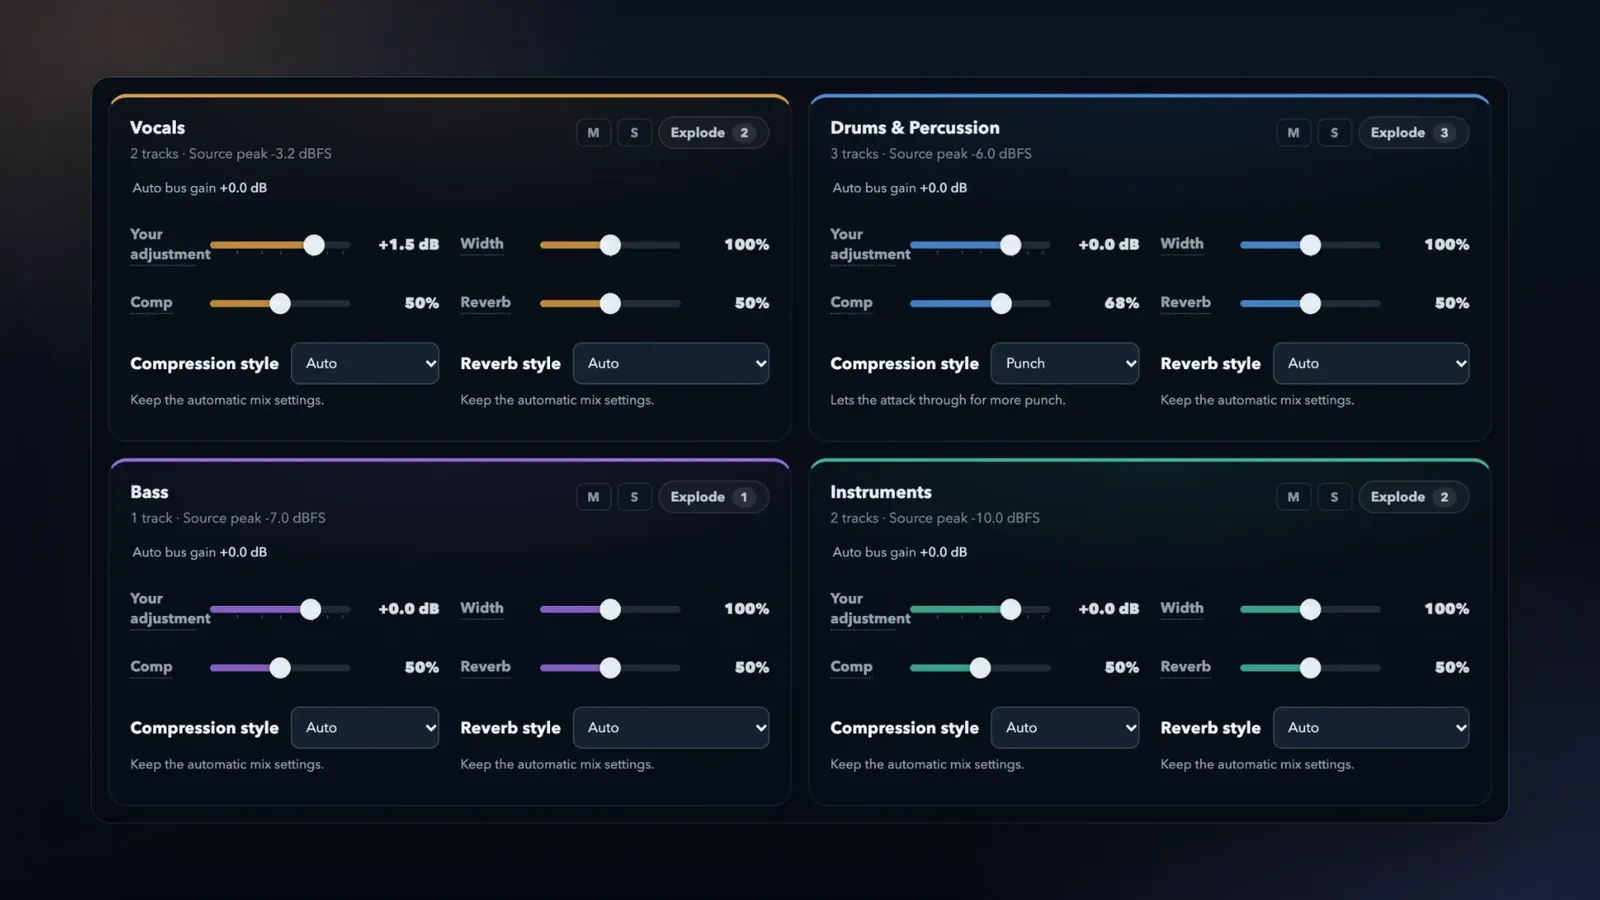
A mix is where a pile of tracks becomes a song. The vocal sits in front, the kick and the bass lock together, and every part gets its own place.
It is also where many home productions lose their punch. Usually not because of one wrong EQ move, but because of a messy export, or because the mix was judged at the wrong volume.
This guide follows a song from your DAW to a master-ready mix: how to export your stems, what a finished mix actually does, how to judge it honestly, and how to hand it to mastering. It works if you mix yourself, if you send your tracks to an engineer, and if you use online mixing, such as LoopMastering Mixing.
The short version: export every track full length from 0:00, as 24-bit or 32-bit float WAV. Turn off reverb, delay and everything on the master channel, and keep the effects that are part of the sound. Build the mix in this order: balance, low end, EQ, dynamics, vocal, space and width. Judge every change at matched loudness, check it in mono and on a phone, and send mastering a mix with no limiter and some headroom.
Multitracks, stems, or a beat and a vocal?
You can mix from three kinds of sessions:
- Multitracks: one file for each instrument or microphone. They give the most control, so they give the best result.
- Stems: groups of tracks, such as all the drums in one file. They mix well too, with a little less control inside each group.
- A beat and a vocal: two files are enough. If you recorded over a beat, upload the instrumental and your vocal tracks. Keep the lead, the doubles and the adlibs as separate files if you have them.
Only have a finished stereo song? Split it into stems first with the Stem Splitter, then mix the stems. Our guide on how to split a song into stems shows how to get clean stems.
LoopMastering Mixing takes from 2 to 60 tracks of one song. Large sessions take longer to mix, so for 40 tracks or more, group obvious doubles and stacks into one file each.
How to export stems for mixing
The export decides more than most people think. A clean export gives the mix something solid to work with. A messy one forces every later step to work around a problem.
- Export every track at full length, from the very start. Start at 0:00 (bar 1) and stop after the last tail, even when a track is silent for most of the song. A part that comes in at 1:30 starts with 1:30 of silence: keep it. Then every file has the same start point, and all of them line up.
- Bounce every instrument to audio. Virtual instruments and MIDI tracks must become audio files.
- Use one format for every file. Keep your session's sample rate (44.1 or 48 kHz) and export 24-bit or 32-bit float WAV. AIFF and FLAC are fine too. MP3 and AAC stems limit the final mix and master. Export mono parts, such as a vocal or a bass, as mono files, and stereo parts as one stereo file, not as separate left and right files.
- Keep every track below 0 dBFS. Check each track, not only the master meter: processing on the master channel can hide a track that clips. In a 24-bit file, everything above 0 dBFS is cut off for good, and no mix can bring it back. A 32-bit float file keeps those peaks, but fix the level anyway: lower the fader or the clip gain, and export again.
- Turn off reverb and delay. The mix adds its own space, and it can shape only the space that it controls. A printed reverb is glued to its track: it cannot duck under the vocal or match the rest of the song. If a delay throw or a reverse reverb is part of the hook, export it as its own FX track.
- Keep the effects that are the sound. A guitar amp, a synth filter, a distorted 808, a vocal effect, a hard-tuned vocal: these are part of the performance. Leave them on.
- Turn off everything on the master channel. No limiter, no bus compressor, no EQ, no "mastering" preset. A master-bus processor reacts to the whole song. When you export one track at a time, it reacts to that track alone, so every stem gets a different treatment that no longer adds up to your rough mix.
- Do not normalize the files. Export at your rough-mix levels, with the faders where they are. Then the files carry your balance, and you can keep it. If every file comes out at the same loudness, your balance is gone.
- Print your edits. Comping, timing fixes and manual tuning should be in the files. If you want natural tuning, the mix can add it, so you do not have to print it.
- Name each file for what it is. "Lead Vocal", "Adlibs", "Kick", "808" and "Rhythm Guitar", not "Audio 14". A clear name makes every later check faster.
- Write down the tempo. Delays can lock to the song tempo when the BPM is known.
- Keep your rough mix, and test the export. Bounce the rough mix once, without a limiter, so you can check that the new mix keeps what you loved. Then import the new files into an empty project, all at 0:00, and play a part that comes in late and the last note of the song. If everything lines up there, the export is right. Files of the same length can still be out of line, so do not skip this test.
In LoopMastering Mixing, the engine listens to each track and works out its role: lead vocal, backing vocal, kick, 808, rhythm guitar, pad and so on. You check the roles before the mix starts. The upload also warns you about lossy files, clipped tracks and very large sessions, and it tells you when your files sound like separate finished songs instead of the parts of one song.
What a finished mix actually does
A finished mix is not a pile of effects. It is a set of decisions, made in an order. Here they are in the order that most engineers work, with what LoopMastering Mixing does at each step.
1. Balance: every part at a level that fits its role
The faders do most of the work in a mix. The lead vocal and the drums set the frame, and every other part sits around them. The genre shapes the balance too: hip-hop keeps the vocal and the 808 loud, and rock gives the guitars more room.
LoopMastering knows a lead vocal from a kick drum. Each track gets a level that fits its role and your genre. You choose from 18 genres, or you leave it on Auto.
2. Low end: the kick and the bass share the floor
The kick and the bass live in the same low frequencies. When they hit at the same time, they fight, and the low end gets loud and muddy instead of punchy. Engineers fix this in two ways: EQ gives each part its own area of the low end, and the bass dips a little under each kick hit.
In LoopMastering, the bass gives way to each kick, and the low end stays in the center, where it is strongest.
3. EQ: room for every part
EQ in a mix is less about making one part sound good alone, and more about making room. Cut the low mids where too many parts pile up, take the low end out of parts that do not need it, and leave space in the upper mids for the words of the vocal.
Do not judge EQ in solo. A guitar that sounds thin alone can be perfect in the mix.
LoopMastering clears space between the instruments, so the vocal, the bass and the drums do not fight. In the console, every track has an EQ with a live curve, and presets such as Reduce Mud, Reduce Harshness, Clear Vocal and Kick Punch give you a quick start.
4. Dynamics: control that keeps the movement
Compression makes the loud and the quiet moments of a part closer in level. A vocal that goes from a whisper to a shout needs it. Too much compression makes everything flat and tiring.
Different parts need different control. Drums need their attack. A vocal needs steady levels. A bass needs even notes.
LoopMastering sets compression for each role. In the console, you can choose a style for each part, such as Glue, Punch, Vocal Forward, Drum Punch or Bass Control.
5. The vocal: in front, clear and in tune
For most listeners, the vocal is the song. Every word must be clear, with no harsh "s" sounds and no popping "p" sounds.
LoopMastering has a de-esser and a de-plosive for each vocal. Auto pitch correction finds the song key and tunes the vocal while you listen. You set the strength, from Gentle to Robotic, the smoothness, and the voice type. To tune only some notes, open manual vocal tuning: it marks the notes that are off the song key, and you fix only the ones that you pick.
6. Space: reverb and delay that step aside
Reverb and delay put parts in a room and give a mix depth. The problem: enough reverb to sound big also blurs the words.
Engineers solve this with ducking. The reverb and the delay get quieter while the vocal sings, and they bloom in the gaps.
LoopMastering Mixing does this for you: reverb and delay duck while the lead vocal sings and come back up between the lines. You can choose a reverb style, such as Plate, Hall, Room, Chamber or Spring, set how long the reverb rings, and lock delays to the song tempo.
7. Width: wide instruments, a solid center
Stereo width makes a mix feel big, but the center holds it together. The kick, the snare, the bass and the lead vocal usually stay in the middle. The low end belongs in mono. If it is spread wide, it gets weaker on phones, small speakers and club systems.
LoopMastering gives the width to the instruments and keeps the low end in the center. A mono check is one click away.
The finishing touches: character and movement
A little saturation makes parts feel warm and close. Changes over time keep the chorus bigger than the verse.
In LoopMastering, Character sets the analog warmth on the vocals, the bass and the drums, from Clean to Driven. Timed changes apply to one part of the song only, for example more reverb on the vocal in the bridge.
Hear more than one mix
An engineer usually sends one mix, and then you ask for changes. LoopMastering Mixing gives you three complete mixes of your song in a few minutes: Clarity, Punch and Space. Each mix gets the full treatment. They differ in feel:
- Clarity: clear detail, a steady foundation and balanced space. Good for pop, singer-songwriter and R&B songs, and any song where every word must land.
- Punch: close vocals, firm drums and a tighter, drier space. Good for hip-hop, rock and EDM, and any song that needs impact.
- Space: open dynamics, wider instruments and deeper ambience. Good for ballads, indie, acoustic and cinematic songs.
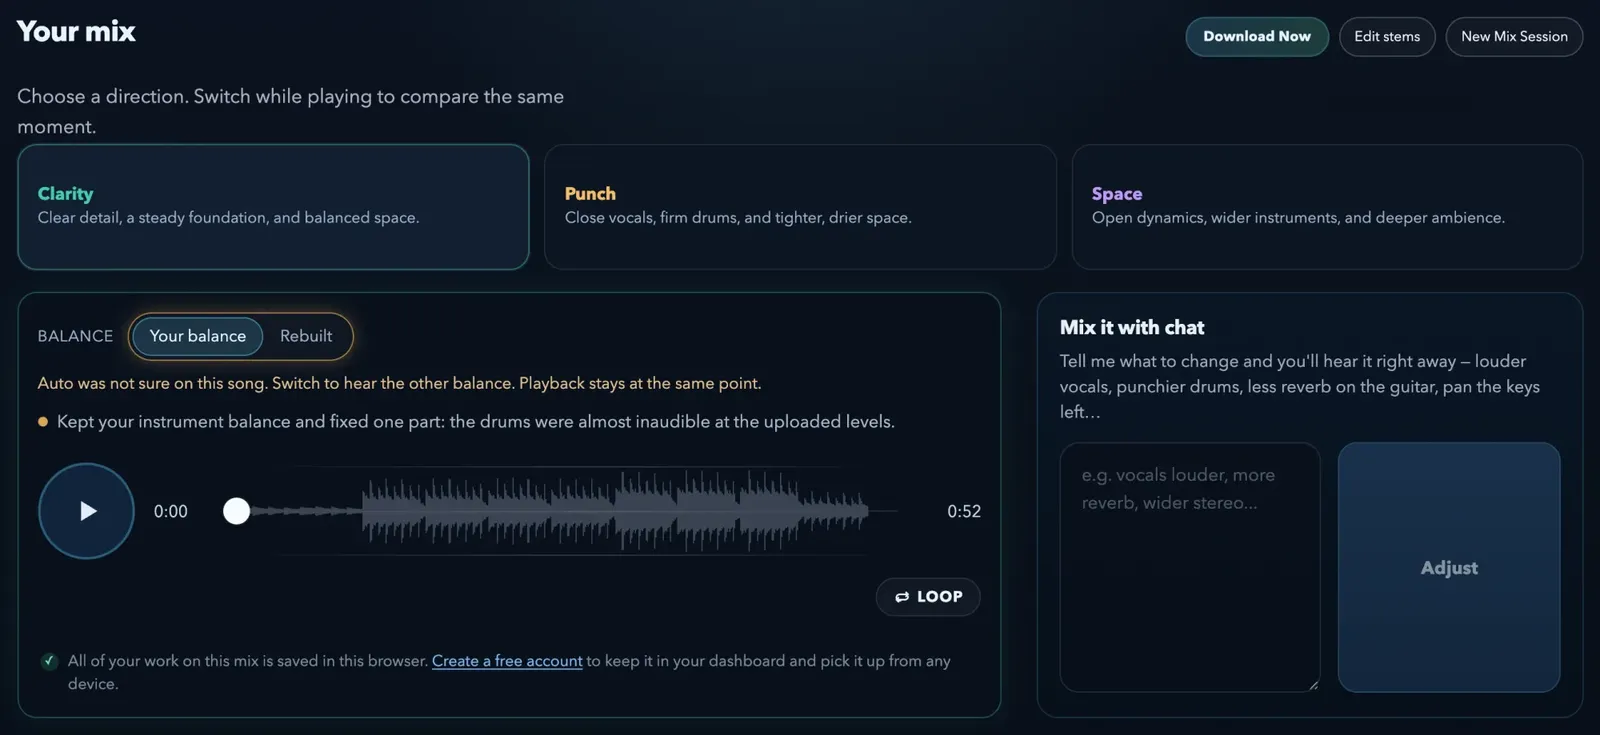
Switch between them while the song plays. Playback stays at the same moment, so you compare the same bar of the song.
Keep your balance, or start fresh
Many producers know this feeling: the rough mix had something special, and the "real" mix lost it. Often the reason is simple. The new mix changed the balance that made the song work.
LoopMastering Mixing has a Balance switch. Your balance keeps your own stem levels and adds the full mix processing. Rebuilt gives every stem a finished-mix level from scratch. On Auto, the engine reads your stems and chooses, and it tells you why, for example: "the lead vocal arrived far quieter than a finished mix would keep it." You can switch at any time, with no new upload, and playback stays at the same point.
This is why step 8 of the export matters: if you normalize every file, there is no balance left to keep.
How to judge a mix honestly
- Match the loudness first. A louder version always sounds better for a moment. This is the most common trap in mixing. In LoopMastering Mixing, Compare plays your unmixed stems at the same loudness as the mix, so you hear the mix and not the volume.
- Listen on more than one system, with one question for each. On a phone speaker: can you still hear the bass line and every word? On earbuds: are the cymbals and the "s" sounds too sharp? In the car: is the low end too big or too thin? The mix does not have to sound the same everywhere. It has to work everywhere.
- Check it in mono. Does the vocal stay in front? Does the bass stay? If a part disappears, a phase or width problem is hiding there.
- Check the busiest and the quietest moments. Listen to the last chorus and to the breakdown, not only to the first verse.
- Keep the volume moderate, and take breaks. Most of the time, listen at about the level of a normal conversation, and turn it up only for short checks. Loud listening tires your ears fast. After a long session, almost anything sounds normal, so come back after a break, or the next day.
- Compare with a reference track in your DAW: a released song in the same style, at the same loudness. Compare the balance and the tone, not the volume. Your rough mix is a reference too. If the new mix lost the feel of the song, compare the two at the same loudness and find what changed.
- Listen for the song, not for the plug-ins. Can you understand every word? Does the chorus lift? Does the groove make you move?
Make it yours: in words, or on the faders
You do not need to know which plug-in fixes a problem. You only need to hear it.
In LoopMastering Mixing, you can type (or say) what you want in your own words, and you hear the result right away:
- "Vocals louder"
- "Punchier drums"
- "Less reverb on the guitar"
- "Pan the keys left"
- "Wider stereo"
- "Bass down a little"
Only the part that you name changes. Every step stays in the history, so you can undo it or go back to it.
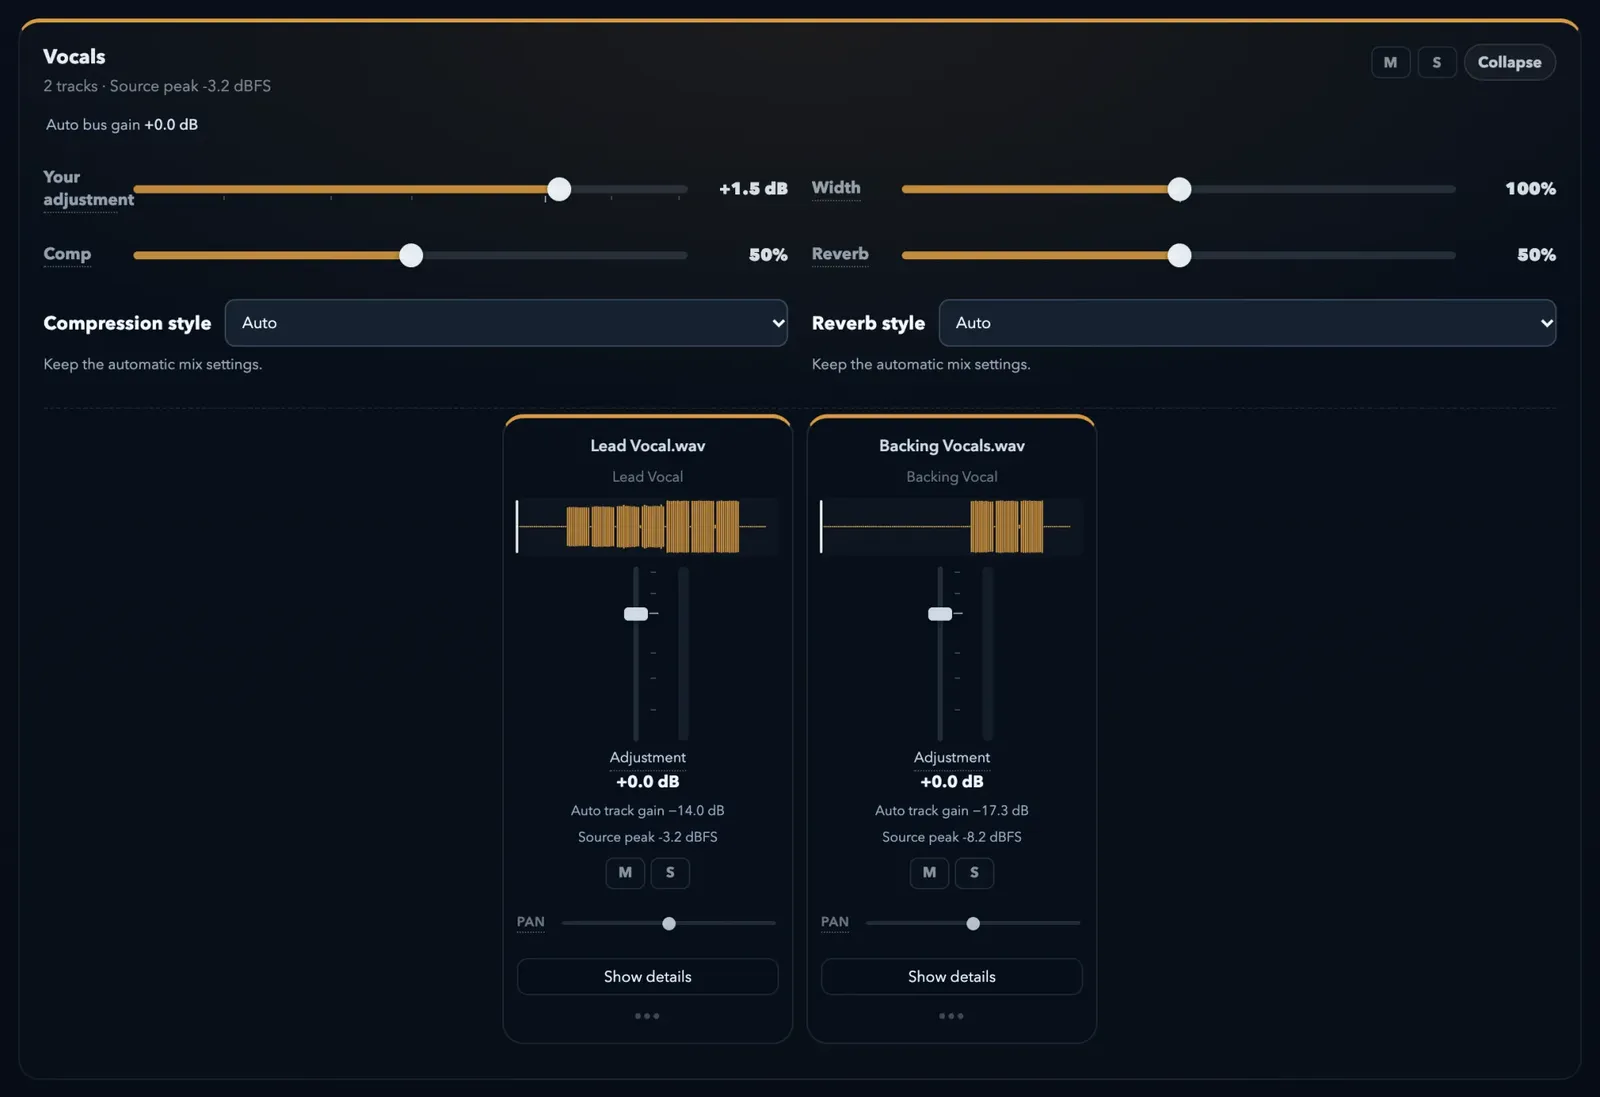
If you prefer the faders, open the console. Every group has its level, pan and width, mute and solo, filters, EQ with presets and a live curve, compression, reverb and delay sends, a de-esser and a noise gate, a stereo widener, chorus, flanger, phaser and tremolo, phase invert and a mono check. Explode any group, and each track gets its own channel. Loop a section while you work on it, and save your settings as presets for your next song.
From mix to master: the handoff
Mastering needs a mix that it can still work with: peaks that are not cut off, some headroom, and full resolution.
When you send a mix from LoopMastering Mixing to mastering, it goes as a 32-bit float WAV, with no limiter on the mix, and with the true peak at or below -1.2 dBTP. The mastering style follows the mix: Clarity and Punch master in Modern, and Space masters in Open. You can also download the WAV and take it to your own mastering engineer.
If you mix yourself, the same rules apply. Our guide on how to prepare a mix for online mastering explains them step by step.
Two numbers cause a lot of confusion here:
- "Leave 6 dB of headroom." This is a habit, not a rule. Mastering needs a mix with no clipping, no limiter, and peaks safely below 0 dB. The exact number does not matter.
- "Mix to −14 LUFS for Spotify." Do not chase a loudness number in the mix. Streaming services such as Spotify set the playback level of every song themselves, and mastering sets the final loudness.
And mastering cannot fix the mix. It works on the finished stereo file, so it cannot bring a buried vocal forward or pull a kick and a bass apart. Fix those in the mix.
Worried about AI flags? Your mix is still your music
Streaming services now check new releases for AI-generated music. Deezer tags albums that contain fully AI-generated tracks, and it keeps those tracks out of its recommendations. On its busiest days in June 2026, more than half of all new uploads were fully AI-generated. TIDAL pays no royalties on fully AI-generated tracks. Spotify, Apple Music and YouTube Music now ask for AI disclosures or show AI labels.
These checks are about generated music: vocals, instruments, melodies or lyrics that a model made, and voices that copy real artists. Deezer's detector, for example, looks for the traces that music generators leave in the audio that they create. Normal studio tools are a different thing. YouTube's guidelines list standard pitch correction and automated mastering software as "No Gen AI".
LoopMastering Mixing generates nothing. It balances, shapes and places your own recordings, and it does not add or replace any musical part. Every note in the mix comes from your stems. Keep those stems: if a distributor asks, they show that the song is your own work.
Quick mix export checklist
Full length: every track starts at 0:00 and runs to the end of the song.
Audio only: every virtual instrument is bounced to audio.
One format: one sample rate, 24-bit or 32-bit float WAV, mono parts as mono files, no MP3s.
No clipping: every track peaks below 0 dBFS.
No reverb or delay: the space is added in the mix, and special throws are on their own FX track.
Character kept: amps, filters and vocal effects that are part of the sound stay on.
Clean master channel: no limiter, no compressor, no EQ.
Your balance: exported at rough-mix levels, not normalized.
Clear names: every file says what it is.
Tested: in an empty project, the files line up at a late entry and at the last note.
Mixing FAQ
What should I upload for a mix?
The separate tracks of one song, exported from the same session: vocals, drums, bass, instruments and so on. Every file must be full length and start at 0:00, so they line up. LoopMastering Mixing takes from 2 to 60 tracks.
Multitracks or stems: which is better?
Both work. Multitracks give the most control, so they give the best result. Grouped stems, such as all the drums in one file, work well too.
Should I remove my effects before I export?
Only reverb and delay, because the mix adds its own. Also turn off everything on the master channel. Keep all the other effects, such as a guitar amp, a synth filter or a vocal effect.
Should I normalize my stems?
No. Export them at your rough-mix levels. Normalized files lose your balance, so the mix cannot keep it.
Which sample rate and bit depth should I use?
Keep your session's sample rate, usually 44.1 or 48 kHz, and export 24-bit or 32-bit float WAV.
Can I mix a beat and a vocal?
Yes. Two tracks are enough: the instrumental and the vocal. Add doubles and adlibs as their own files if you have them.
How long does a mix take?
Usually a few minutes. It depends on the number of tracks and the length of the song. You can leave the page and get an email when your mixes are ready.
How loud should my mix be before mastering?
No clipping, no limiter, and peaks safely below 0 dBFS. You do not need an exact number, such as −6 dB of headroom. When you send a mix from LoopMastering Mixing to mastering, the handoff is prepared for you.
Can mastering fix a bad mix?
No. Mastering works on the finished stereo file. It shapes the tone and the loudness of the whole song, but it cannot bring a buried vocal forward or pull a kick and a bass apart. Fix those in the mix.
Does LoopMastering Mixing add AI-generated sounds?
No. The engine balances, shapes and places your own recordings. It does not generate, replace or add musical parts.
What file do I get?
A 32-bit float WAV of the mix that you choose, named after your song. You can hear all three mixes for free, with no account. To download, pay once for the song or go Unlimited.
Hear three mixes of your song
The fastest way to learn what a good mix does is to hear your own song mixed three ways. Export your tracks with the checklist above, upload them to LoopMastering Mixing, and switch between Clarity, Punch and Space while the song plays.
The short version: export clean, full-length tracks with no reverb, delay or master-channel processing, build the mix from balance to width, judge it at matched loudness and in mono, and send mastering a mix with headroom. That is how a pile of stems becomes a finished song.